Apple has been push the latest Mac OS X E1 Capitan to the global users last month, and most of them have upgraded to the latest operating system. However, have you ever found that you are unable to use a certain video in the way you wanted because of the the upgraded Mac OS X El Capitan? How to watch any format video on whatever digital device you have on Mac OS X El Capitan? You are lucky here, here I introduce a best Mac video converter software for the latest Mac OS X E1 Capitan, Pavtube iMedia Converter for Mac OS X E1 Capitan, which let you easily convert your favorite movies/videos into popular formats compatible with your current players/devices.
With this best Video Converter for Mac OS X El Capitan, you can convert various video files, such as MOV, AVI, MP4, FLV, MKV, 3GP, MP3, FLAC, etc. Let you able to enjoy them on your Mac OS X El Capitan, as well as other portable devices such as iPhone, iPad, Apple TV, Android, Windows Phones, PSP, PS3, and so on. Meanwhile, you can also use it for some simple editing before conversion (splitting, trimming and combining, rotating and cropping, quality improvement, etc.). There will be no loss of image quality, and conversion itself is swift and effective.

Other Download:
– Pavtube old official address: http://www.pavtube.cn/imedia-converter-mac/
– Cnet Download: http://download.cnet.com/Pavtube-iMedia-Converter/3000-2194_4-76177788.html
Brief Introduction of Tutorial for iMedia Converter for Mac OS X E1 Capitan
Step 1. Load Files.
Start up Pavtube iMedia Converter for Mac OS X E1 Capitan, Load video files to the software using any of the three ways below:
A. Click “File” menu, and select “Load IFO/ISO”, “Load from folder”, “Load from disc”, “Add Video/Audio” or “Add from folder” to import source files.
B. Click “Load file(s)” button or “Add video” button to import source files
C. Open the folder that contains source files, and drag and drop video, audio and image files to the program.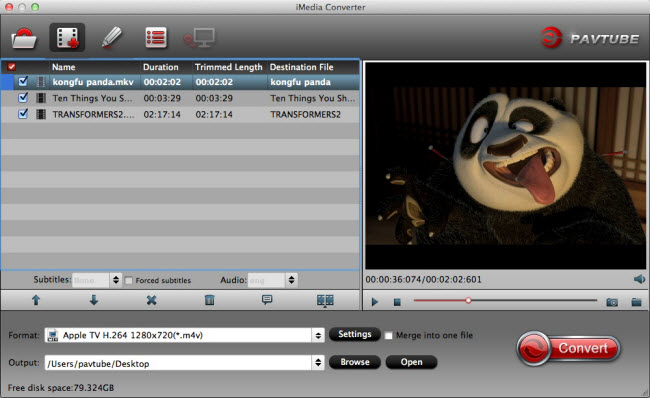
Step 2. Set Output Format.
Clicking the Format bar, you can choose output format from the format list or customize which formats to be shown on the list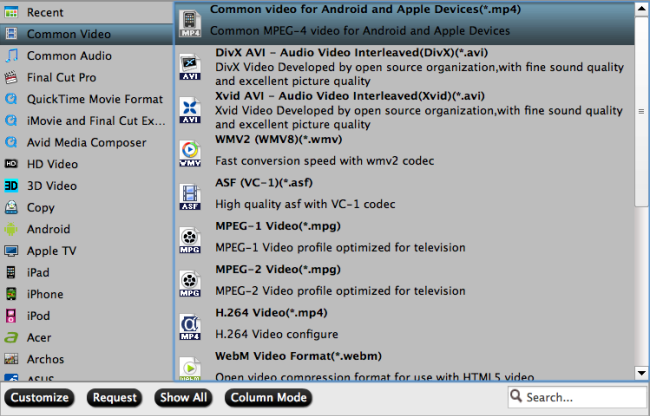
Step 3. Set Profiles.
All formats here are set with optimized video/audio codecs, bitrates, frame rates, etc. But you can still specify as you like by clicking Settings button.
In the Profile Settings window, you can choose or specify exactly the parameters you like. And in the Task information section, you can compare the detailed information of the source video and the target video.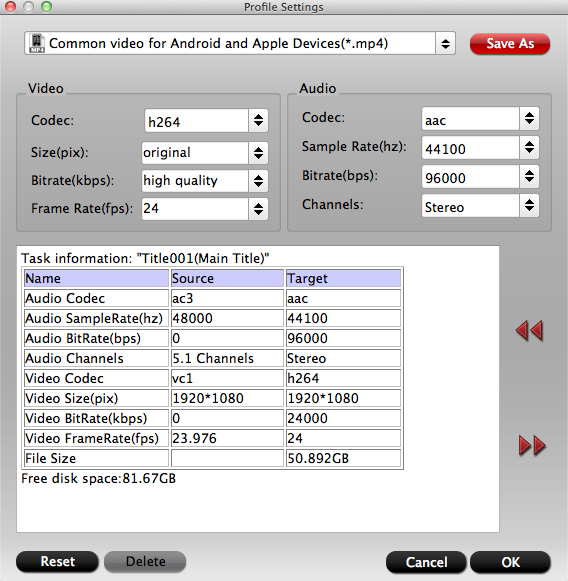
Step 4. Start Conversion.
Clicking the Convert button on main interface, you can go to Conversion window to start conversion.
Note: If you are looking for a more cost-effective video converter for Mac OS X E1 Capitan, Pavtube Video Converter for Mac and Pavtube HD Video Converter for Mac may be suitable for you.
Read More:
- Add SRT Subtitles to AVI File on Windows 10/Mac El Capitan
- VOB to iMovie: Open and Edit VOB files in iMovie via Mac El Capitan
- Convert H.265/HEVC to PS4 for Samsung TV via Mac El Capitan
- Creating 3D Blu-ray movies to view in Oculus Rift DK2 via Mac El Capitan
- Copy Blu-rays to Quicktime/iPad on Mac OS X El Capitan