


HandBrake Batch Convert Tutorial Summary:
If you are still struggling with HandBrake a lot, you’d better choose a HandBrake alternative which will not let you Google answers to questions like “how to batch convert”, “how to built iPhone presets”, “how to fix HandBrake errors” etc. Here, get the best answer to this question here. It tells you how to batch convert/encode videos including resizing and compressing step by step the recommended the Top Handbrake alternative.

Far From Perfect – Batch Video Conversion isn’t supported Until HandBrake 0.9.5.
Do you fill your phone or tablet with stuff to watch before a big trip? If you do, then you know your device can fill up quickly. Wouldn’t it be nice if you could do batch conversions of your favorite videos to the ideal size? But batch video conversion isn’t supported by HandBrake until the release of HandBrake 0.9.5. In the old days, HandBrake users have to load and convert videos one by one. It’s really troublesome. Today, we’ll show you how to batch convert videos with HandBrake (0.10.5) in detail and best HandBrake Alternative.
Part I: Step Guide – Batch Convert/Encode Videos Using HandBrake?
Imagine if you had several dozen files and you wanted to shrink them all in one unattended batch job. You could start this process in the morning before you went to work, or at night before you go to bed. Then all you would need to do is transfer them over to your mobile device when its finished. In this article, we’re going to explain the simple process of converting a batch of video files in the open-source video conversion application Handbrake.
Configuring Your Output Directory
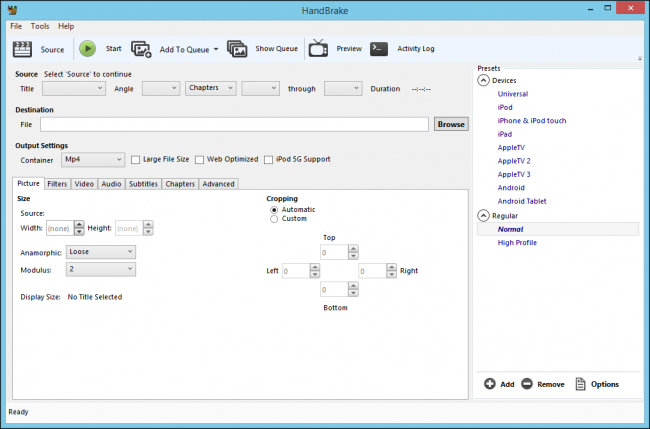
Fire up Handbrake. The first thing you need to do is change one of the program’s preferences.
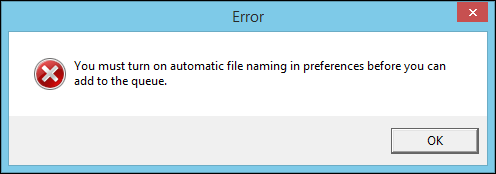
Initially, if you try to run a batch conversion, you will receive this error. In reality, it’s not that automatic file naming needs to be turned on, rather we need to set a folder for our queue to save its output files.
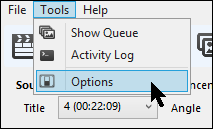
Click “Tools -> Options” to open the preferences.
In the preferences, click “Output Files” and then click the “Browse” button next to Default Path.
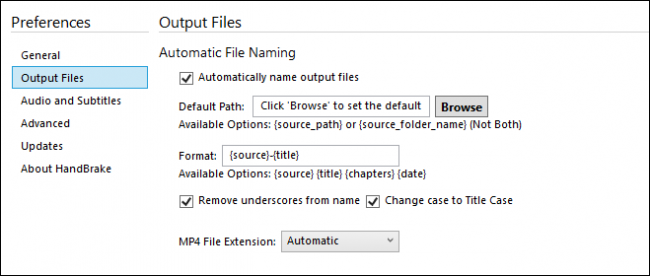
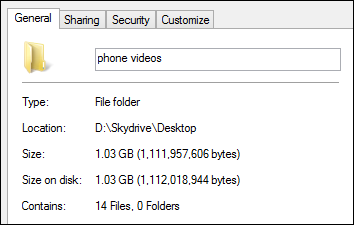
Now, select a folder where you want the queue to automatically save its output files. In this example, we’re going to output to a folder on our Desktop so it’s easy to find.
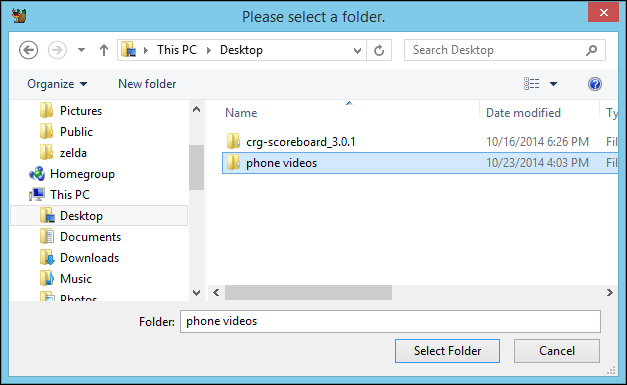
Once you’ve decided where your phone videos will go, click “Select Folder” and you’re ready.Adding Videos to a Queue
You can add videos to a queue one by one, which is what you will do if you want to select videos from several locations, or if you want to add select files in one location.
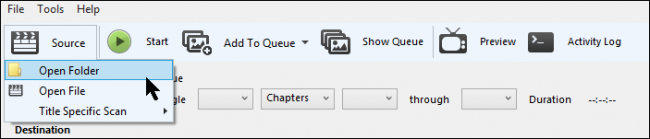
In our example, we’re going to click “Open Folder,” which will add everything from a single folder.
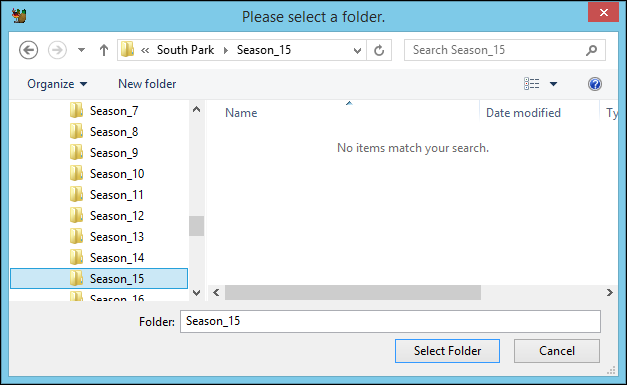
File Explorer will ask you to select a folder. Browse to the location where your source videos are stored, choose the folder, and click “Select Folder.”
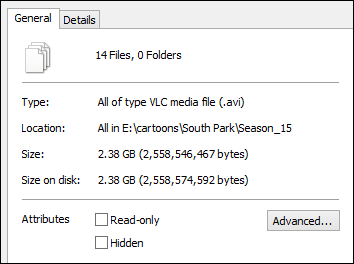
For the sake of comparison, so we can later see how much space we’ll be saving once our batch conversion is done, let’s check out how much space the 14 files we’re converting take up. This group is over 2GB, 2.38GB to be exact.
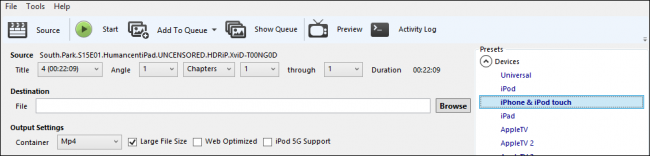
So, with our folder selected, we’ll click “iPhone & iPod touch” from the Presets. Handbrake will automatically adjust the Output Settings according to the Presets selection.
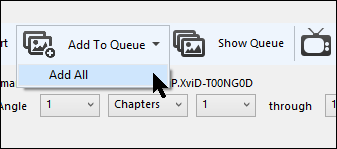
Click “Add to Queue -> Add All” and your files will be added to the queue. Note, the whole idea behind the queue, is that you can add many files, from different locations, as one big job. So, once you add one folder to the queue, you can add another, or single files from various locations.
The point is, if you need a lot of files converted in one go, put them in the queue.
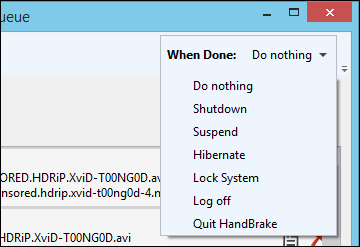
The Queue itself has several options that you can adjust. Perhaps most pertinent is the the “When Done” pulldown menu, which lets you choose what Handbrake does when your batch job is completed. Some of these affect your system, such as being able to shutdown or hibernate, so they’re ideal if you want to start a job, go to bed or work, and your system won’t run for hours and hours after Handbrake is finished.
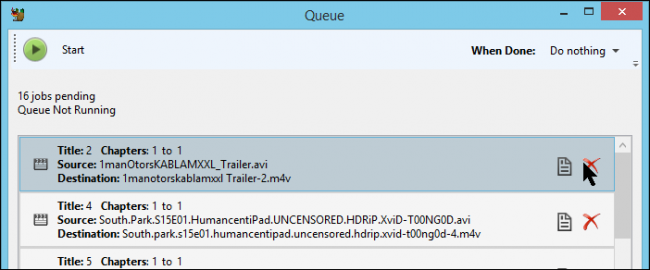
Take a look at your Queue, there’s more options available. For example, there might be some titles that you don’t want to convert.
You can remove those by clicking the red X, or you can edit individual files, like if you want to convert them to a different format. Note, clicking the “Edit” button will kick you back to the Handbrake app so you can make your change(s).
If you do need to make changes, click “Show Queue” and you’ll see your job again, ready for action. Click “Start” when you’re ready.
The thing about a batch conversion is that it will probably take quite awhile to complete, which is why you’d normally start one before work or bed, or whenever you’re going to be away from the computer for a time.
Understand also, the length of time it takes to complete will depend upon how many files are in your queue, how large they are, and how fast your computer is.
If you want to pause the job, press the “Pause” button. If you want to change the “When Done” setting, you can do that too.

When our job is complete, we compare the space savings. We managed to save over fifty-percent. Just imagine how that translates over several dozen files.
Source:http://www.howtogeek.com/199993/converting-videos-by-the-batch-with-handbrake/
Part II: Alternative way: Using HandBrake Alternative to Batch Convert Videos
Sometimes, Handbrake cannot support the codec in some AVI, MKV files or crashes when converting. Here, we’ll focus on Pavtube Video Converter Ultimate <Review>, one of the best HandBrake alternatives. It is highly recommended due to many aspects:
– Preferences setting are not required for batch converting;
– You don’t need to create presets manually, because this batch video converter comes with hundreds of multimedia formats MP4, MKV, AVI ,WMV, MOV, etc. as well as devices profiles including PS4, Xbox One, etc;
– It is also a Blu-ray/DVD copy, Blu-ray/DVD Ripper, video editor, besides a SD/HD video converter.
Comparing with Handbrake, Pavtube Video Converter Ultimate is a more ideal tool to convert AVI, WMV, MKV, VOB, MXF, AVCHD, FLV, WebM, OGV, SWF, RMVB, to your Devices/Media players supported formats without quality loss. Furthermore, it can also convert your Devices/Media players unsupported audio formats like AC3, M4A, AIFF, FLAC, 3GA, RA, OGG, M4B, QCP, VOC, SHN, CAF, APE, AU, and etc to Devices/Media players supported MP3, AAC and more. The video editing function of Video Converter cannot be ignored. It can easily cut off the unwanted parts to Devices/Media players, add subtitles/watermarks to Devices/Media players, and more.
For Mac users, Pavtube iMedia Converter for Mac is also a helpful app to encode videos for further usage as an Handbrake alternative for Mac OS Sierra.
Free Download HandBrake Alternative Batch Converter:


– Pavtube old official address: http://www.pavtube.cn/blu-ray-video-converter-ultimate/
– Cnet Download: http://download.cnet.com/Pavtube-Video-Converter-Ultimate/3000-2194_4-75938564.html
Hot Search: Rip Protected DVD with Handbrake | Handbrake Add Soft Hard Subitles to Movies
Guide to use the HandBrake Alternative to Batch Convert Videos
Step 1: Import video files
Launch the Video converter, then head to the folder where the video are stored. Click “Add video” to import the video files to the program.

Step 2. Select output format
Click “Format” and choose MP4 from “Common Video” or “HD Video” as output format, the most compatible video format for your TV/Media Players, Roku, Apple TV etc.

Learn >> Handbrake Alternative to Compress Large File Size
Step 3. Video/Audio settings
Simply click Settings bar and you can tweak the settings to your satisfaction. With the right settings you can retain the quality of the original videos while also saving space. This is particularly helpful when streaming over your network, depending on your network quality.
Learn >> Best Video Quality Settings for Handbrake
Tip:
Frame rate matters. Encode your video files at 29.97 frames per second rather than the standard 30 fps. Otherwise, be prepared for a lot of buffering.
Bit rate matters. Encoding at a bit rate that’s too low will create blockiness in playback, particularly with action scenes. Start with a rate of 2.5 Megabits per second. The trade-off in file size is worth it.
Step 4. Edit the video Files (Selectable)
Click “Edit selected task”:
Go to the “Trim” window to cut off videos.
Go to the “Crop” window to adjust the video size.
Go to the “Watermark” window to add watermarks.
Go to the “Subtitle” window on insert subtitles.
Step 5. Start converting video
Finally, hit the “Start conversion” button at the bottom of the main interface to start the conversion in batch. After the conversion, click “Open” to quickly find the converted movies for streaming and playing without any incompatible problem.
Read More:


