For Mac users who are looking for a free way to rip commercial DVD movies to MP4 for conveniently transferring and viewing on iPhone, iPad on the move or stream to your large screen TV via Apple TV, we highly recommend the combination of Free DVDAid for Mac + Handbrake for Mac. The main reason is that Handbrake can’t handle commercial DVD movies with copy protection, therefore, you can first bypass all DVD copy protection with our powerful DVD disc decrypter software Pavtube Free DVDAid (which can’t output MP4 but other digital file formats such as AVI, WMV, MOV, MKV, FLV, MPEG-1, MPEG-2, etc), then download Handbrake for Mac to convert non protected DVD movies to your desired MP4 file formats. The following article will show you the full workaround of ripping DVD to MP4 on Mac with those 2 remarkable 2 program.
Break copy protection from DVD with Pavtube Free DVDAid for Mac
Unlike other lower quality free DVD Ripper tool on the market that try to trick you into installing adware or spyware, Pavtube Pavtube Free DVDAid for Mac is very clean and safe, you can feel free to download and install it on your Mac computer. The program can powerfully bypass all DVD copy protection including including region code, RCE, key2Audio, UOP, CSS, Macrovision, Disney X-project DRM (99 titles DVD encryption included), FluxDVD, Protect, ARccOS, AACS, BD+, ROM Mark, BD-Live, etc from both DVD disc, Video_TS folder and also ISO image file. You can rip DVD to various popular SD and HD file formats including AVI, WMV, MP4, MKV, MOV, FLV, WebM, ASF, MPEG-1, MPEG-2, HD AVI, HD WMV, HD MPEG-2, etc but MP4 file formats is not supported.
Step by Step to Remove Copy Protection from Commercial DVD Movies with Pavtube Free DVDAid
Step 1: Import DVD Movies.
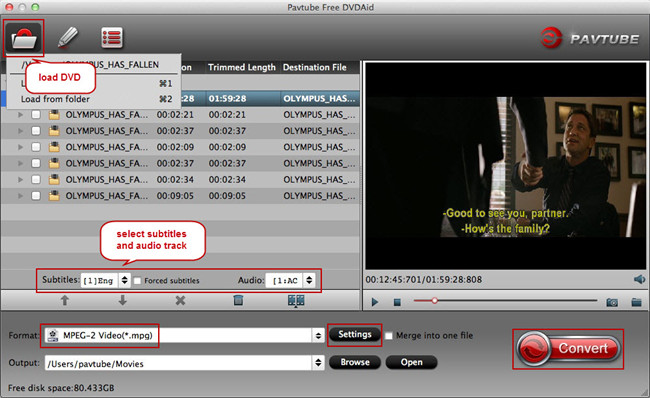
Download, install and run this Free Mac DVD ripper. You can load DVD by clicking “File” > “Load from disc”. Or load DVD Folder by clicking “File” > “Load from folder” or load DVD IFO/ISO image by clicking “File” > “Load IFO/ISO”.
Step 2: Choose output file format
Clicking the Format bar, from its drop-down list, choose one of your desired SD or HD file formats.
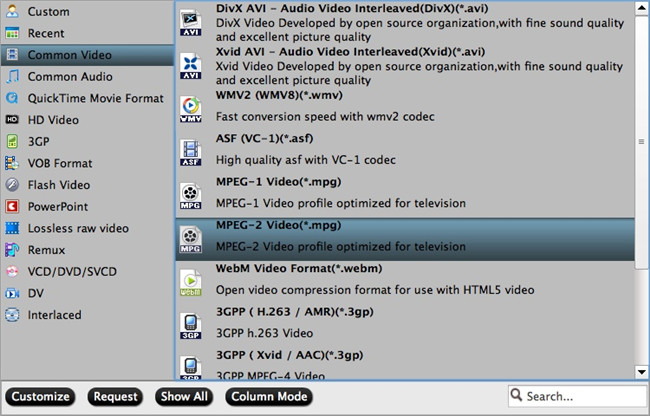
Tips: If you want to customize output video quality, click “Settings” button to customize video quality like resolution, frame rate, bit rate, audio channel, etc.
Step 3: Edit DVD movies on Mac
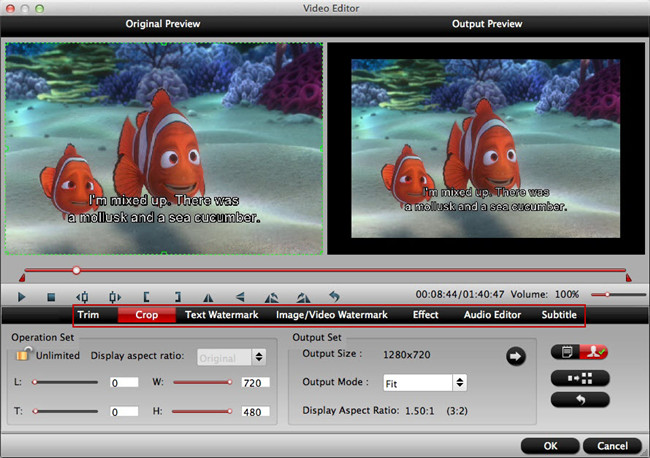
Click the “Edit” button on the main UI and edit your movies before conversion. Many video editing options are available: Trim, Crop, Text Watermark, Image/Video Watermark, Effect, Audio Editor, and Subtitle.
Step 4: Start the final conversion process.
Hit right-bottom conversion button to start commercial DVD to non protected digital format conversion process.
When the conversion is done, you will get a digital file without protection.
Convert video to MP4 with Handbrake for Mac
Step 1: Download and install Handbrake for Mac on your computer.
Step 2: Load source video.
Click the “Source” button on the main interface to add video, DVD or non-drm protected Blu-ray to the program.
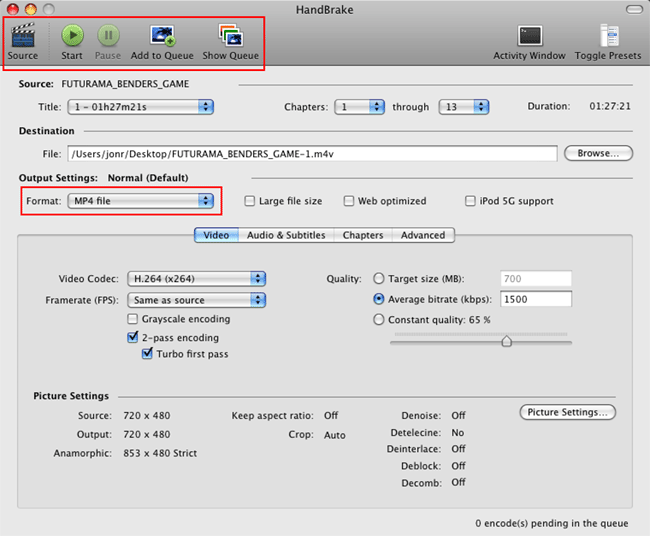
Tips: Handbrake support to input multiple file formats, but it can only convert them one by one, if you want to transcoding many video at a time, if you find a Handbrake alternative application.
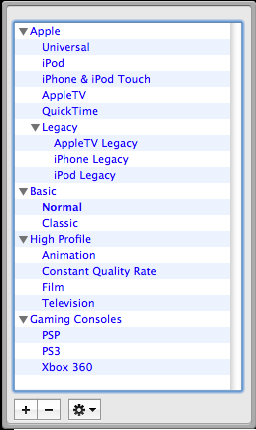
Step 3: Select output format and preset for your device.
You can output video to MP4 encoded H.264, H.265, MPEG-2, MPEG-4 compression codec with Handbrake on Mac. Handbrake also output presets for devices such as iPhone, iPod, PSP, Xbox, etc so that you can directly make the output choice without confusing by the complex advanced settings.
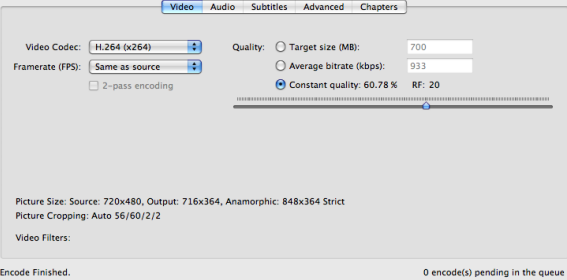
Step 4: Adjust video and audio settings.
You can adjust video filter, video, audio subtitles, chapters, etc to make the output videos more suitable.
Step 5: Start to convert video to MP4 with Handbrake on Mac.
When all the settings is over, hit “Start” button on top-left of the interface to start the video conversion process with Handbrake.
Then you can get your desired MP4 video for viewing on iPhone, iPad on the move or stream to large screen TV via Apple TV.


