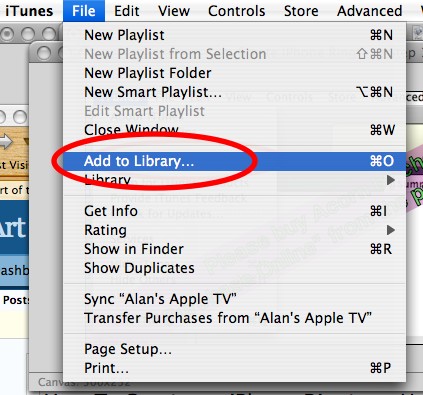
Try to add your MKV movies to iTunes library, but it doesn’t read that file format? The main reason is that iTunes only supports MKV and QuickTime format video files. However, the multimedia container MKV file format can be encoded with many iTunes incompatible video codec such as H.265, MPEG-1, MPEG-2, VC-1/WMV, Real Video, MVC, VP8, VP9, etc.

Luckily, you can easily solve this by converting MKV to iTunes readable file format. Although there are many free program on the web that claims to do the job for you. However, you may find that some of them like Handbrake or MediaCoder is too complicated to operate, others like Free Make Video Converter or Any Video Converter may trick you into installing adware or spyware. There are still some free online converter programs may lack the ability to handle MKV files with certain codec. If you are looking for a powerful, safe and yet simple to use application, we highly recommend Pavtube iMedia Converter for Mac (review). The program has full support for all MKV files encoded with different video and audio codec, you can easily produce iTunes supported video and audio formats listed below:
Video formats: MKV, MOV, M4V
Audio formats: MP3, AAC, AIFF, WAV, purchased M4A and M4P files
You can then flexibly adjust output profile parameters such as video codec, resolution, bit rate, frame rate, audio codec, bit rate, sample rate, channels, etc to get better output video and audio quality. If you wish to sync MKV files to iPhone/iPad/Apple TV via iTunes, you can use the directly produce iDevices specially optimized file formats with the optimal playback settings.
Besides MKV, you can also use the program to convert other incompatible file formats such as MP4, AVI, WMV, FLV, H.265, etc and even commercial Blu-ray/DVD disc into iTunes library.
How to Convert Unsupported MKV for Adding to iTunes library?
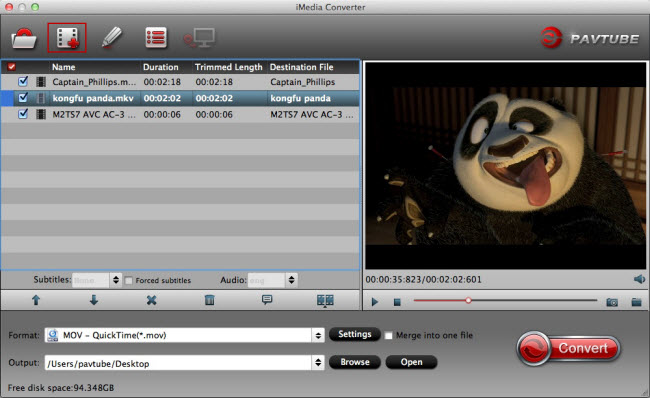
Step 1: Add MKV files into the program.
Run the program on your computer and click “File” > “Add Video/Audio” or “Add from folder” to add unsupported MKV files into the program.

Step 2: Specify output profile format.
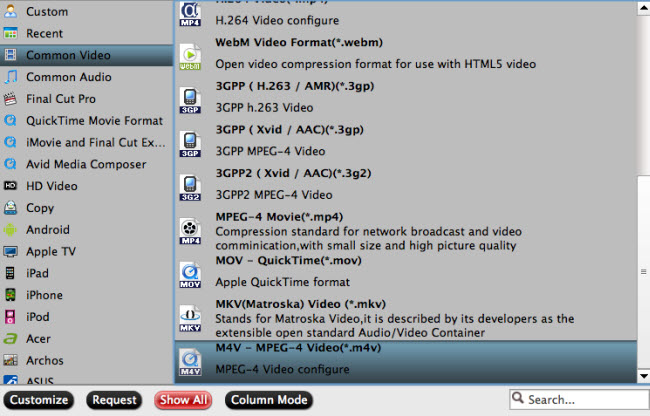
Click “Format” bar drop-down list, choose iTunes best supported “M4V – MPEG-4 Video(*.m4v)” under “Common Video” main category.

Tips: Click “Settings” on the main interface to open “Profile Settings” window, here, you can flexibly choose or specify exactly the parameters including video codec, resolution, bit rate, frame rate, audio codec, bit rate, sample rate, channels, etc as you like to get better output video and audio quality.
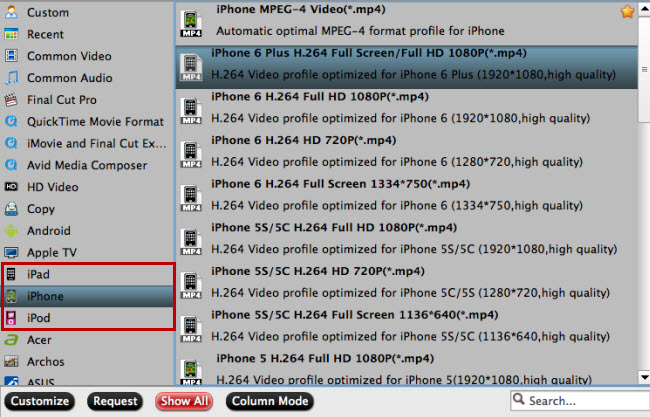
If you wish to sync files to from iTunes to iPad/iPhone/Apple TV, just output iPhone/iPad/Apple TV preset profile formats, which will ensure a successfully iTunes to iOS device syncing process.

Step 3: Start MKV to iTunes conversion process.
After all settings is completed, hit right-bottom “Convert” button to start to convert MKV to iTunes supported file formats and settings conversion process.
When the conversion is completed, hit the “Open Output Folder” on the main interface to pop out the folder with the converted files. Then feel free to add and play MKV files on iTunes or sync MKV files from iTunes to iPad/iPhone/Apple TV.
Further Reading:
Two Ways of Converting AVI to iTunes on Mac OS Sierra
Watch MKV, AVI, FLV, M2TS(Blu-ray), Video_TS to Apple TV 3 via iTunes
Rip Blu-ray to iTunes to Watch on Apple TV with Dolby Digital 5.1 and AAC Stereo
H.265 to iTunes Converter – Sync HEVC Video to iPad/iPhone/iPod touch
Video_TS iTunes solution: how to transfer Video_TS to iTunes


